If you admin more than one Jira Cloud site, a dropdown appears. Choose the site you want to install into and click Install app. Atlassian handles the rest.
Open any Scrum or Kanban project
Navigate to any Jira project that uses the Scrum or Kanban template. A new tab labelled GanttBoard appears in the project sidebar.
2. Your first Gantt chart
GanttBoard draws bars from the start date and due date fields on your Jira issues. If an issue has both, it appears on the timeline immediately. If an issue is missing one, it shows up in the table but has no bar yet.
Add dates to your Jira issues
Open any issue in your project and fill in the Start date and Due date fields. If Start date is not shown on your issue view, add it via Configure → Project settings → Issue layout.
Open the GanttBoard tab
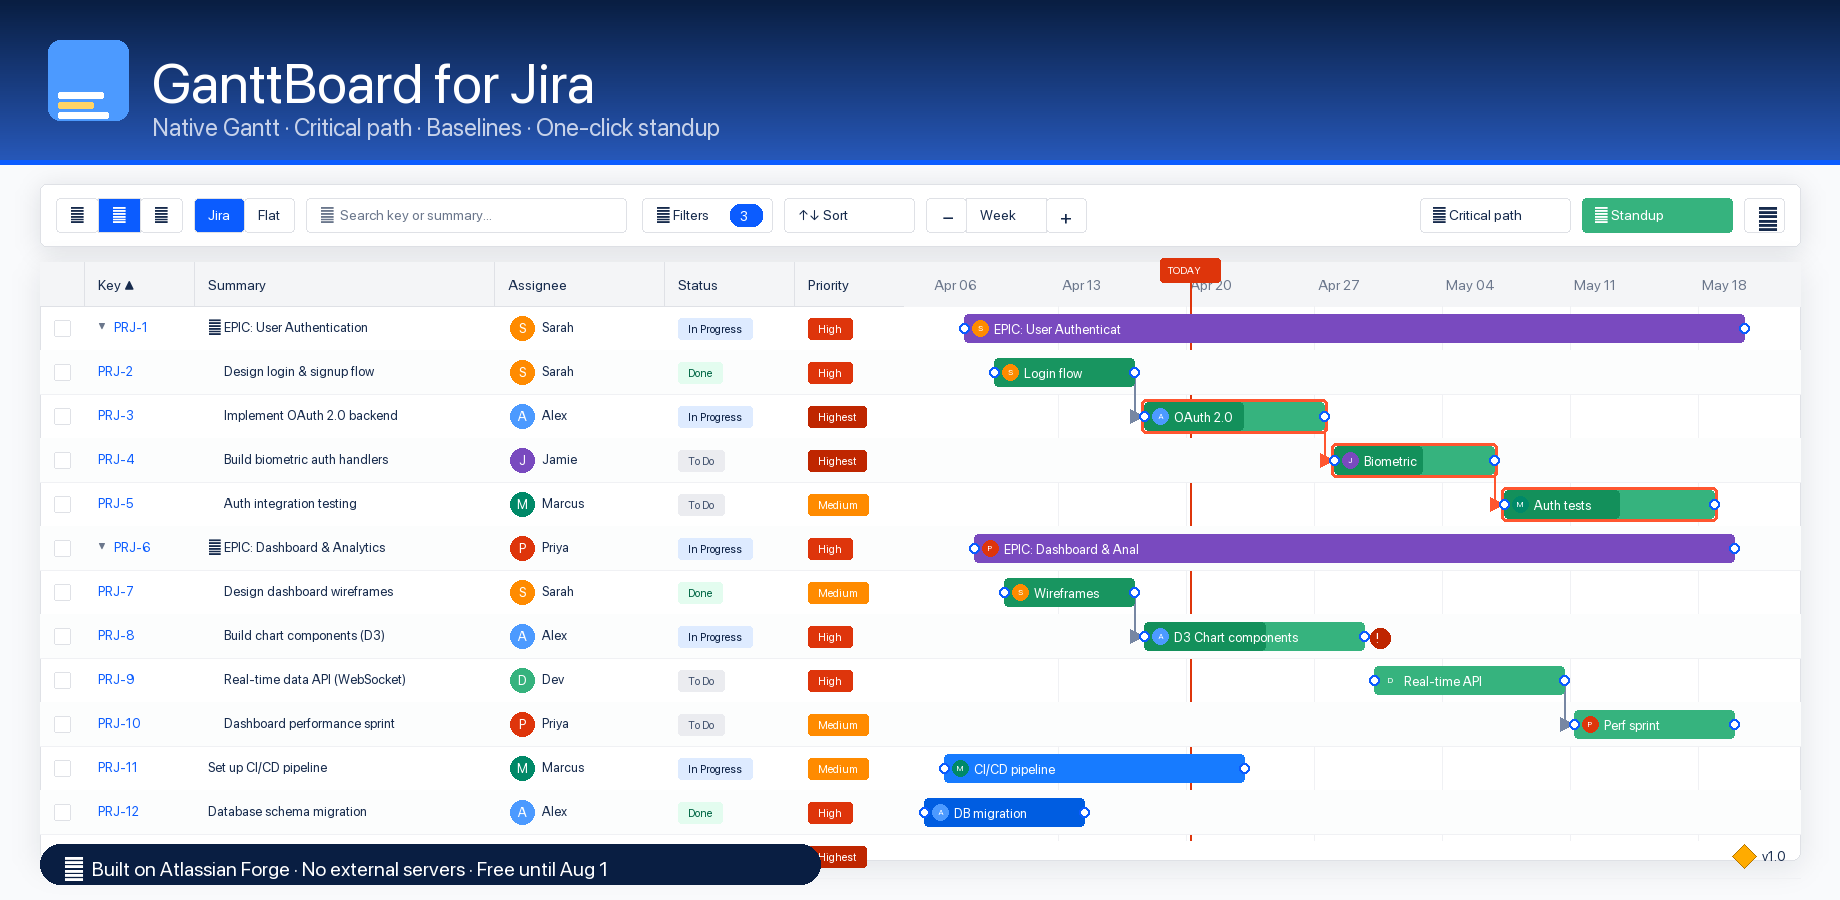
Click GanttBoard in the Jira project sidebar. The Table + Gantt split view is the default. Your issues appear in the spreadsheet on the left and as bars on the right.
Switch layouts and zoom
Use the toolbar segmented control to toggle Table-only, Gantt-only, or the default split. Use the zoom dropdown (or Ctrl++ / Ctrl+−) to move between Day / Week / Month / Quarter granularity.
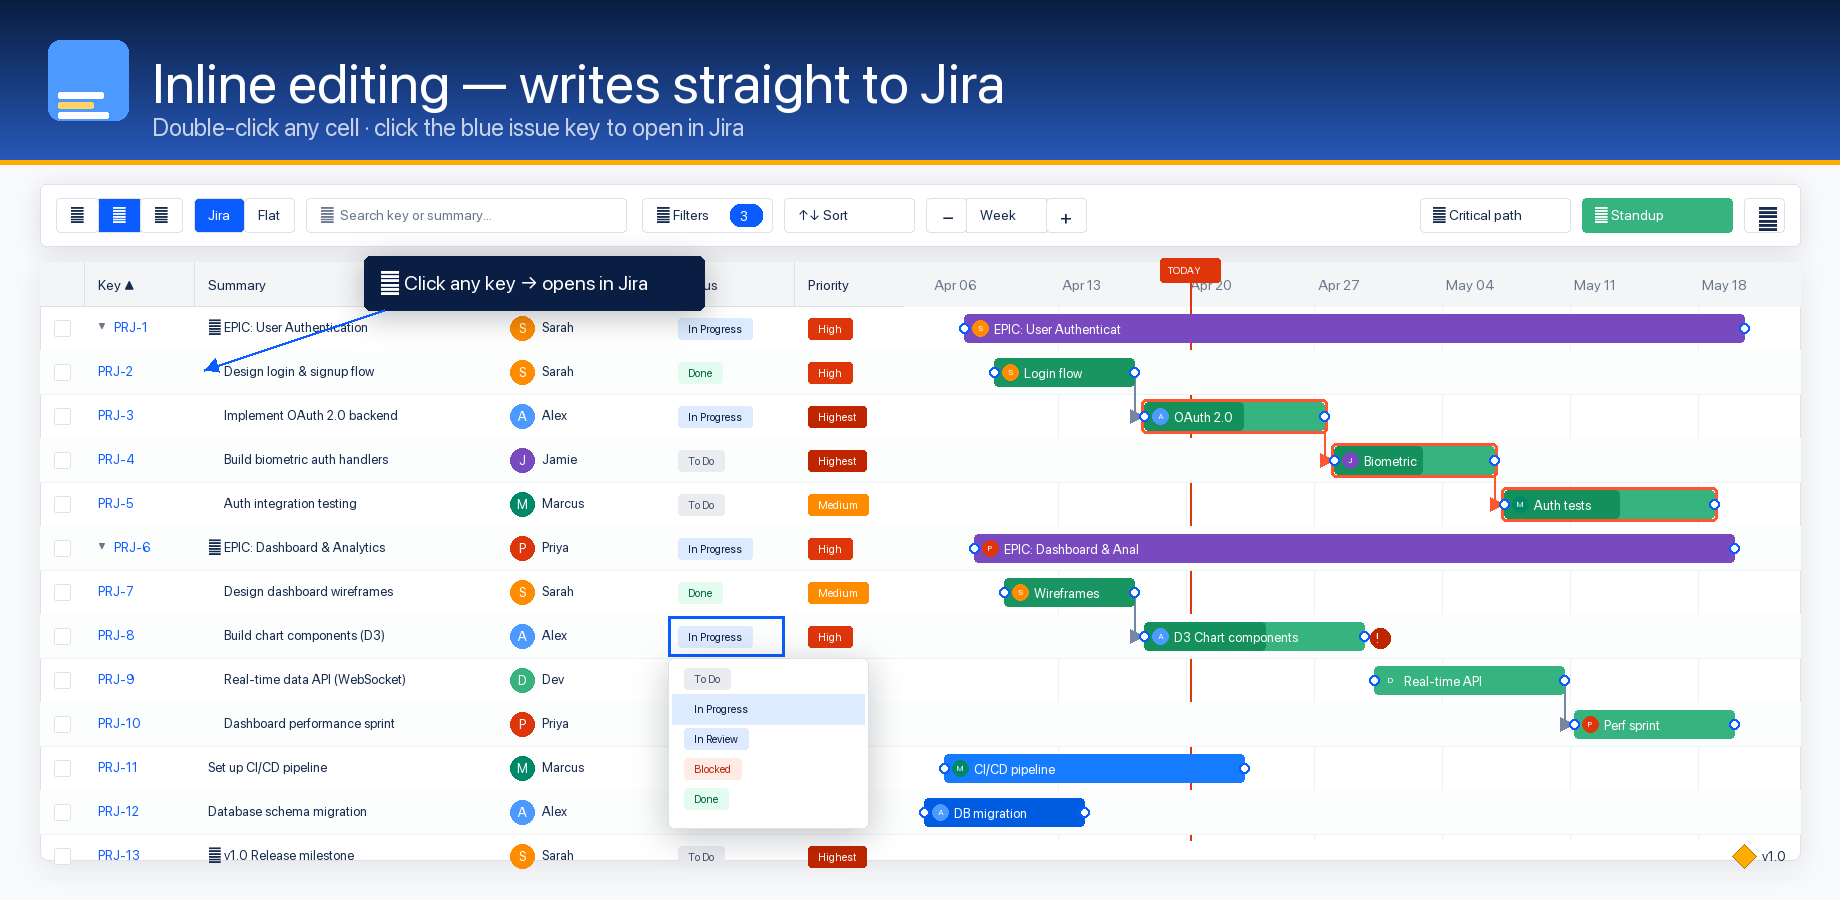
Edit in place
Drag any bar horizontally to change its due date. Drag its right edge to change duration. Double-click a status cell in the table to transition the issue. Every change persists to Jira in real time.
3. Setting dependencies
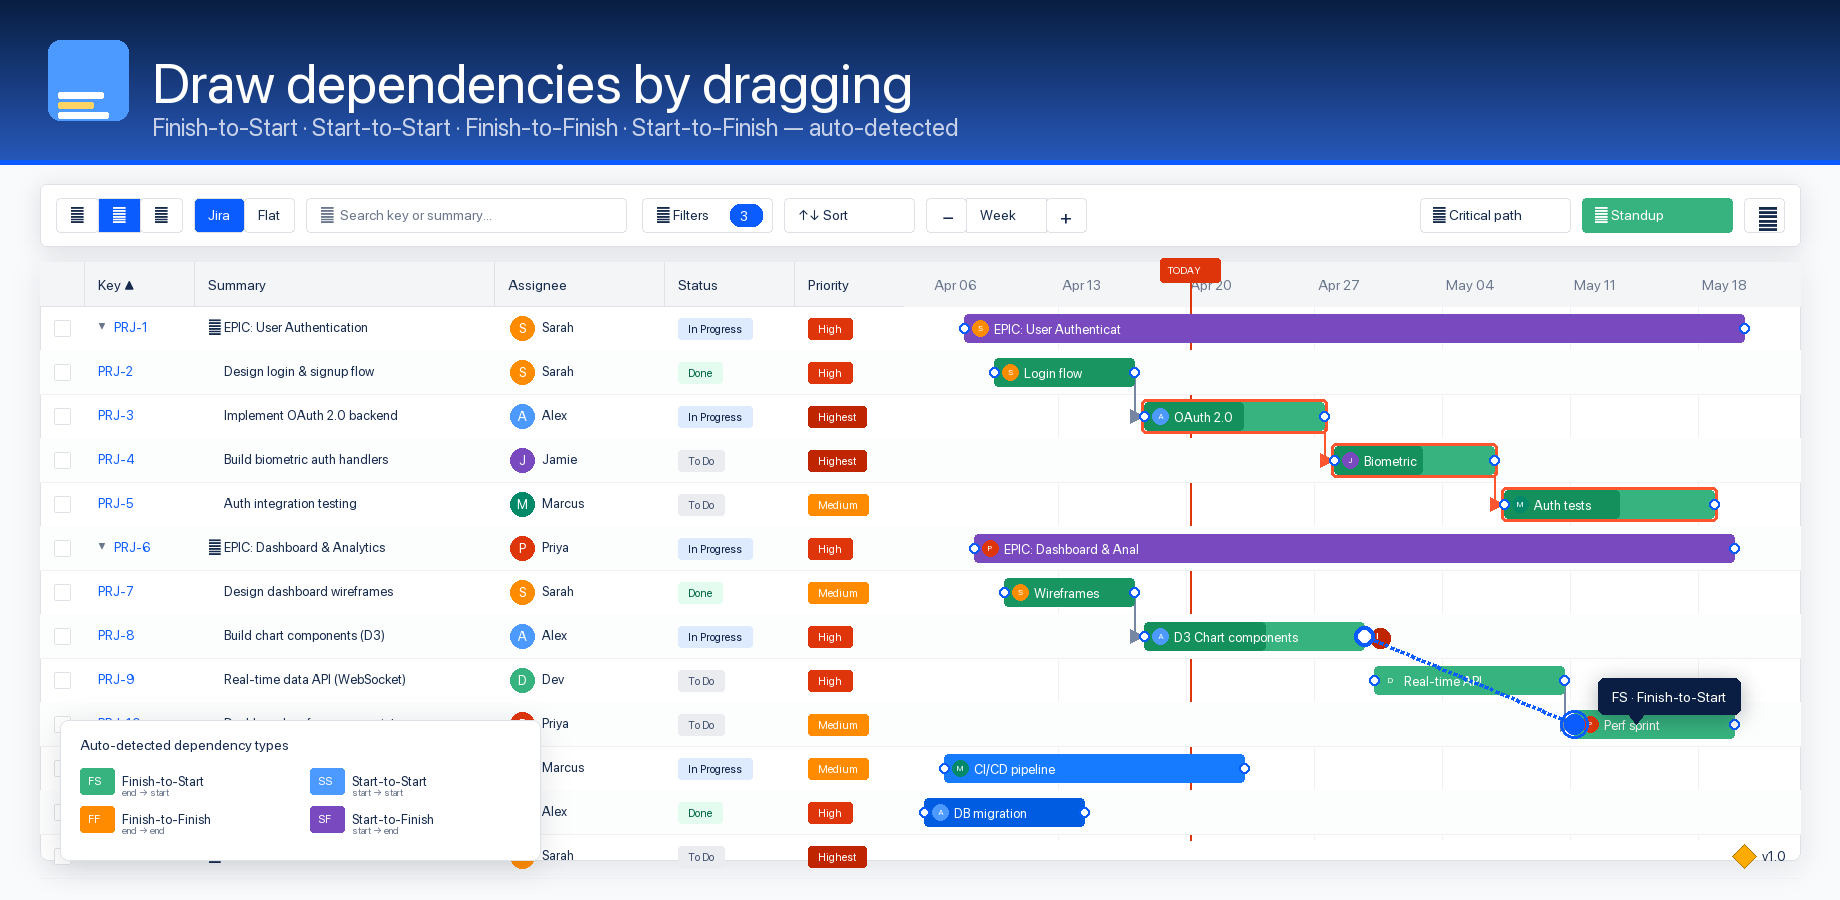
Dependencies are drawn with L-shaped arrows between task bars. GanttBoard supports all four project-management dependency types: Finish-to-Start (FS), Start-to-Start (SS), Finish-to-Finish (FF), and Start-to-Finish (SF).
Hover over a bar to see the dots
Every bar has a small dot at its start and end edges. Hovering makes them visible.
Drag from one dot to another bar's dot
Click and hold on a dot, then drag to a dot on another bar. GanttBoard auto-detects the dependency type from the dots you chose — end-to-start is FS, start-to-start is SS, and so on.
Confirm the type and lag
The Dependency dialog opens with the detected type pre-selected. You can change the type or add a lag / lead time in days, then click Create. The arrow renders immediately.
Turn on critical path
Once you have dependencies, click the Critical path toggle in the overflow menu. GanttBoard runs CPM (forward pass, backward pass, float calculation) and highlights the longest chain across the project in red.
Prefer menus? Right-click any bar and choose Link to... to pick a target issue from a dropdown instead of dragging.
4. Keyboard shortcuts
Press ? at any time inside GanttBoard to open the full shortcuts panel. Mod means Cmd on macOS and Ctrl on Windows / Linux.
Navigation
Previous task
↑
Next task
↓
Collapse group
←
Expand group
→
Open task in Jira
Enter
Clear selection
Esc
Next field
Tab
Previous field
ShiftTab
Selection
Select task
Click
Toggle selection
ModClick
Range select
ShiftClick
Select all tasks
ModA
Editing
Undo
ModZ
Redo
ModShiftZ
Delete selected
Delete
New dependency from selection
ShiftD
Toggle expand / collapse
Space
View
Zoom in
Mod+
Zoom out
Mod−
Show shortcuts
?
Stuck on something?
Email minawefky3@gmail.com or open a GitHub issue. We reply within one business day.